How to Tile a Shower in 10 Easy Steps: A DIY Guide
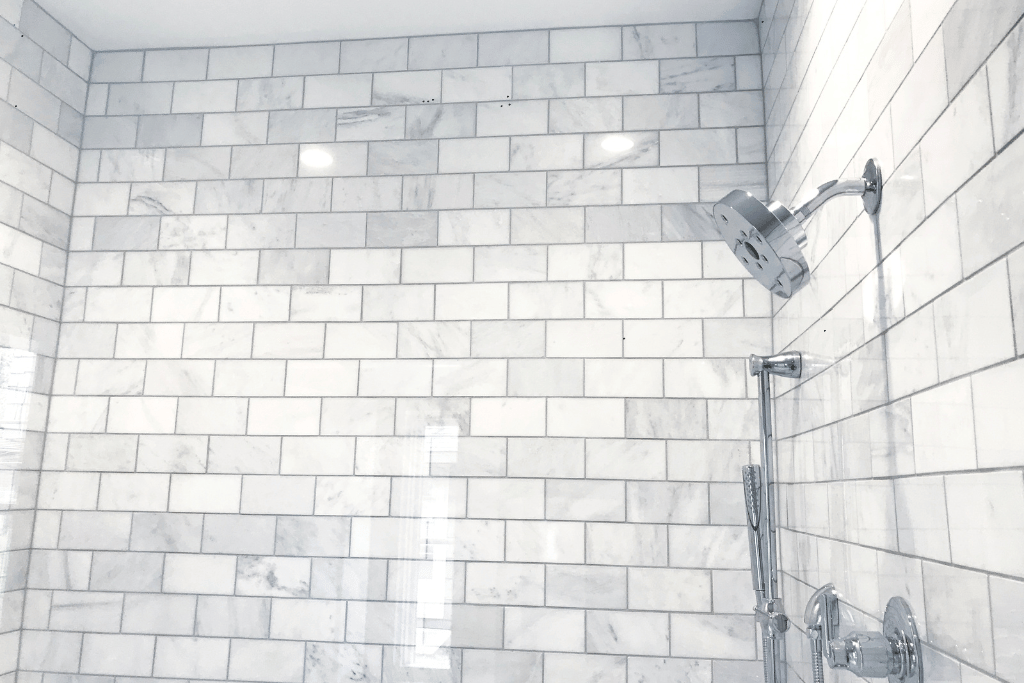
Tiling a shower is a rewarding DIY project that can dramatically transform your bathroom. It’s a labor of love that requires patience, precision, and a touch of artistry. If you’re up for the challenge, let’s dive in and learn how to tile a shower like a pro!
Brainstorm Your Shower Tile Project First!
So, you want to learn how to tile a shower like a pro? Great! Before you start breaking tiles, careful planning is essential. This is where your vision takes shape.
Choose tiles that complement your bathroom’s style, considering factors like color, size, and pattern. Measure your shower area accurately to determine the quantity of tiles needed.
Gather Your Tools and Materials
A well-equipped toolbox is your ally in this endeavor. Essential tools include a tile cutter, level, notched trowel, grout float, and spacers. As for materials, you’ll need tiles, thinset mortar, grout, waterproofing membrane, and sealant.
How to Tile a Shower in 10 Easy Steps
Tiling a shower is a rewarding project that can dramatically transform your bathroom. While it requires time, patience, and precision, the end result is a space that’s both beautiful and functional. Let’s dive into the process, step by step.
Step#1 – Protect Your Workspace
Before you begin, it’s crucial to protect your workspace. Cover your tub or shower base with a thick plastic sheet or drop cloth to prevent damage from falling debris, water, and grout. This seemingly small step can save you from costly repairs.
Step#2 – Remove the Existing Tile and Backer Board
To start fresh, you’ll need to remove the old tile and backer board. This can be a messy job, so wear protective gear, including gloves, goggles, and a dust mask.
Assess the condition of the wall: Determine if the wall behind the tile is in good shape. If there’s water damage or mold, you’ll need to address these issues before proceeding.
Choose your removal method: You can either chip away at the tiles individually or remove larger sections using a hammer and chisel. For larger areas, consider renting a demolition hammer.
Remove the backer board: Once the tiles are removed, carefully pry off the old backer board. This might involve using a pry bar or a circular saw.
Step#3 – Prepare the Shower Wall
Before installing a new backer board, ensure the wall is clean, dry, and structurally sound.
Remove debris: Clean the wall thoroughly to remove any dust, mortar residue, or adhesive.
Check for moisture: If there are signs of moisture or mold, address the issue before proceeding. This may involve using a mold-killing product and allowing the area to dry completely.
Install waterproofing membrane: Apply a waterproofing membrane to the entire shower area, including walls and floor. This crucial step prevents water damage and leaks. Follow the manufacturer’s instructions for application and curing time.
Step#4 – Install Cement Board
Cement board provides a sturdy base for your tiles.
Measure and cut: Measure the shower walls and cut the cement board to size using a circular saw or a scoring tool and snap method.
Attach the cement board: Apply construction adhesive to the back of the cement board and secure it to the wall with cement board screws. Ensure the boards are level and flush.
Tape the seams: Apply cement board tape over the seams between the boards and embed it in thinset mortar. This creates a watertight seal.
Step#5 – Plan Your Tile Layout
Choose your tile: Select tiles that complement your bathroom’s style and consider factors like size, color, and finish.
Determine the starting point: Decide where to begin tiling, usually a corner or a central focal point.
Create a layout: Use chalk lines to mark the horizontal and vertical lines for your tile placement. This will help ensure straight rows and even spacing.
Step#5 – Mix the Thinset Mortar
Thinset mortar is the adhesive that bonds the tiles to the wall.
Choose the right thinset: Select a thinset mortar specifically designed for ceramic or porcelain tile, depending on your choice.
Follow the instructions: Mix the thinset according to the manufacturer’s recommendations, usually with water. Use a mixing paddle on a drill for even consistency.
Achieve the correct consistency: The thinset should have a peanut butter-like texture. If it’s too thick, it won’t spread easily, and if it’s too thin, it won’t provide adequate support for the tiles.
Step#6 – Install the Tiles
This is where your design comes to life.
Apply thinset: Spread a thin layer of thinset mortar on the wall using a notched trowel. The notches create grooves for better adhesion.
Place the tiles: Press the tiles firmly into the thinset, ensuring they are level and aligned with your layout lines.
Use spacers: Insert tile spacers to maintain consistent gaps between the tiles.
Cut tiles as needed: Use a tile cutter or wet saw to cut tiles for corners, edges, and around fixtures.
Step#7 – Grouting
Grout fills the gaps between the tiles and adds a finished look to your shower.
Choose your grout: Select a grout color and type that complements your tiles. Unsanded grout is typically used for tiles smaller than 1/8 inch, while sanded grout is suitable for larger tiles.
Mix the grout: Follow the manufacturer’s instructions for mixing the grout with water.
Apply the grout: Press the grout into the tile joints using a grout float, working it diagonally to ensure complete filling.
Remove excess grout: Wipe away excess grout with a damp sponge, being careful not to remove grout from the joints.
Allow the grout to cure: Let the grout dry completely before sealing it.
Step#8 – Seal the Grout
Grout sealing protects the grout from stains, mold, and mildew.
Choose a sealer: Select a grout sealer specifically designed for your grout type.
Apply the sealer: Apply the sealer according to the manufacturer’s instructions, usually with a sponge or brush. Allow the sealer to dry completely.
Step# 9 – Caulk the Edges
Caulking the edges of the shower creates a waterproof seal and prevents water from seeping behind the tiles.
Choose a caulk: Use a high-quality silicone caulk specifically designed for bathrooms.
Apply the caulk: Apply a bead of caulk along the edges of the shower where the tiles meet other surfaces, such as the tub, walls, and ceiling.
Smooth the caulk: Smooth the caulk with a caulk tool for a neat finish.
Step#10 – Allow Sufficient Curing Time
Before using your shower, allow the thinset, grout, and caulk to cure completely. This typically takes 24 to 48 hours.
This concludes our step-wise guide on how to shower a tile. Remember, tiling a shower is a skill that improves with practice. Don’t be afraid to experiment with different tile patterns and designs. With patience and attention to detail, you can create a stunning shower that enhances your bathroom’s overall appeal.
Common Issues You Might Face When Tiling a Shower Wall
Even the most experienced DIYers can encounter challenges while tiling a shower. Let’s address some common problems and their solutions.
1. Uneven Tiles
Uneven tiles can mar the overall appearance of your shower. Here’s how to address this issue:
- Check for level surfaces: Ensure the wall is perfectly level before starting. Use a level to verify the surface’s flatness.
- Correct inconsistencies: If the wall is uneven, apply additional thinset mortar to compensate for the discrepancies.
- Use tile spacers: Consistently use tile spacers to maintain uniform gaps between tiles.
- Check for proper installation: Ensure tiles are pressed firmly into the thinset and that the thinset is spread evenly.
2. Cracked or Chipped Tiles
Accidents happen, but there are ways to prevent tile damage:
- Handle tiles with care: Avoid dropping tiles or dragging them across surfaces.\
- Use proper tools: Employ a tile cutter or wet saw for precise cuts, reducing the risk of chipping.
- Check for defective tiles: Inspect tiles before installation for cracks or imperfections.
- Address underlying issues: If multiple tiles are cracking, there might be an underlying problem with the wall or subfloor.
3. Grout Issues
Grout problems can affect both the appearance and functionality of your shower:
- Grout haze: This filmy residue can be removed with a grout haze remover or a mixture of vinegar and water.
- Cracked grout: If grout is cracking, it might be due to improper mixing, insufficient curing time, or excessive water exposure. Remove the cracked grout and reapply.
- Uneven grout lines: Ensure consistent grout application by using a grout float to spread the grout evenly.
- Mold and mildew: Prevent these issues by sealing the grout and ensuring proper ventilation in the bathroom.
4. Tile Detachment
- Check for inadequate thinset: If tiles are loose due to insufficient thinset, remove them, clean the surface, and reapply thinset before reinstalling.
- Address water damage: If water has seeped behind the tiles, it can cause detachment. Dry the area thoroughly and apply a waterproofing membrane before reinstalling.
- Inspect for structural issues: In severe cases, tile detachment might be caused by underlying structural problems. Consult a professional for evaluation.
5. Caulk Problems
Caulk is essential for creating a watertight seal, but it can also cause issues if not applied correctly.
- Mold and mildew: Regularly clean and replace caulk to prevent mold and mildew growth.
- Caulk shrinkage: If caulk shrinks or cracks, remove the old caulk and apply a new bead.
- Caulk application: Ensure the caulk is applied in a continuous, even bead and smoothed out for a neat finish.
Final Words
Tiling a shower is a project that can significantly enhance your bathroom’s aesthetics and functionality. While it demands patience, precision, and attention to detail, the sense of accomplishment is heartwarming. The steps outlined in this guide on how to tile a shower will help you proceed with the project with confidence.
Remember, tiling is a skill that improves with practice. Don’t be discouraged by initial challenges. With each project, you’ll gain valuable experience and refine your technique.
If you prefer to leave the tiling to the professionals, consider JMK Plumbing, your trusted plumbing experts in Miami. We specialize in a wide range of plumbing services, including expert tile installation. Let us transform your bathroom into a luxurious oasis. Contact us today to schedule a consultation.