A Detailed Guide on How to Run Plumbing for an Upstairs Bathroom
Adding a bathroom upstairs increases the value and convenience of your house significantly. However, getting the plumbing set up for this new haven requires careful planning and some hands-on work. This in-depth guide will break down how to run plumbing for an upstairs bathroom in easy-to-understand terms, giving you the knowledge you need to navigate this project smoothly.
Planning the Big Move: Important Things to Think About Before You Begin
Let’s begin our guide on how to run plumbing for an upstairs bathroom!
Finding the Perfect Spot:
Decide where you want your new bathroom to be. Think about how close it is to the existing plumbing pipes in the bathroom or kitchen downstairs. The shorter the distance the pipes need to travel, the easier and less expensive the installation will likely be. Also, make sure the ceiling is high enough for proper drainage and venting.
Following the Rules:
Check with your local building department to find out what permits you’ll need and what building codes you have to follow. This will ensure your project is safe and avoids any problems or setbacks later on.
Picking the Right Pipes:
Many people choose PEX tubing for this project because it’s affordable, easy to use with crimp or push-on fittings, and flexible enough to bend around tight corners. Copper pipes are strong and last a long time, but they require soldering skills and special tools. If you’re not sure which type of pipe to use, talk to a professional plumber.
Drains and Vents Explained:
Every fixture (toilet, sink, shower) needs its own drain line that slopes downward to carry wastewater away. A venting system is also very important because it stops sewer gases from coming up into the bathroom. Vents allow air to move freely within the drain system, which prevents pressure from building up.
Water on Demand:
Find the main water shut-off valve in your house. This will allow you to turn off the water supply completely while you’re installing the new pipes. Identify the hot and cold water lines that you’ll need to extend to reach the new bathroom fixtures.
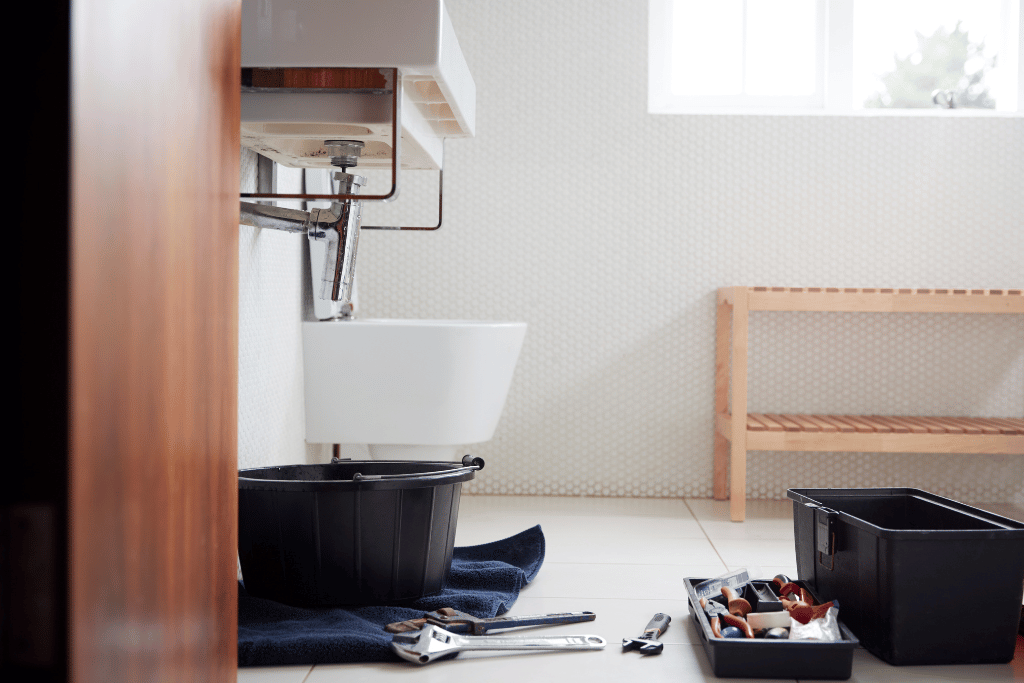
Tools and Supplies You’ll Need
Once you have a solid plan, it’s time to gather the tools and supplies you’ll need:
- Pipe cutters: Scissors for PEX tubing or a pipe cutter for copper pipes.
- Crimping or soldering tools: These depend on the type of pipe you choose.
- Drill and drill bits: You’ll need different sizes for drilling holes through walls and floors for the pipes.
- Sawzall: This is for cutting through framing members, but always consult with a structural engineer first to make sure you’re placing the support beams correctly.
- Safety glasses and gloves: Safety first, always!
- Pipes: PEX tubing or copper pipes in the correct sizes for each fixture (usually ½ inch for hot and cold water lines, and 2 or 3 inches for drains).
- Pipe fittings: These will connect the pipes together. For PEX tubing, you’ll need crimp rings and clamps. For copper pipes, you’ll need solder and flux.
- Drain traps (P-traps): These create a water barrier that stops sewer gases from entering the bathroom.
- Shut-off valves: These allow you to turn off the water supply to individual fixtures.
- Toilet flange: This is the base that holds the toilet securely to the floor.
How to Run Plumbing For an Upstairs Bathroom: The Step-by-Step Process
Learning how to run plumbing for an upstairs bathroom requires a step-by-step approach, ensuring each stage is completed carefully and with precision. Here’s a detailed breakdown on adding upstairs bathroom:
Step#1 – Roughing It In: Making Way for the Pipes
Marking Your Territory:
Grab a tape measure and mark the exact locations on the floor and walls where each fixture (toilet, sink, shower) will be situated. Double-check these measurements to ensure everything aligns perfectly when you install the fixtures later.
Drilling with Precision:
Following the marked layout and adhering to local building codes, carefully drill holes through the floor joists and wall studs. These holes will provide the pathway for your new pipes. Remember, proper support is crucial! Consult with a structural engineer if unsure about placement to avoid weakening the structure of your home.
Building the Drainage System:
Starting from the drain outlet of each fixture, begin installing the drain lines. PEX tubing is a popular choice due to its ease of use.
Here’s how to tackle it:
Cutting to Length: Use sharp pipe cutters specifically designed for PEX tubing to ensure clean, straight cuts. Measure the distance between the drain outlet and the connection point for each fixture, adding a little extra for wiggle room. Cut the PEX tubing to these lengths.
Connecting the Pieces: PEX uses a crimp or clamp fitting system. Slide the appropriate crimp ring or clamp onto the end of the tubing. Insert the pipe into the fitting of the drain outlet or another piece of tubing. Use your crimping tool (for crimp rings) or tighten the clamp securely to create a watertight seal.
Repeat this process to connect all the drain lines, ensuring they slope slightly downwards (about ¼ inch for every foot) towards the main drain line. This slight downward slope is vital for proper drainage, allowing wastewater to flow smoothly away from the fixtures.
Don’t Forget the P-Trap: A P-trap, also known as a drain trap, is a U-shaped pipe that sits beneath each fixture. It holds a small amount of water, creating a barrier that prevents sewer gases from entering your bathroom through the drain. Install a P-trap under each drain line using the appropriate fittings.
Vent Your Frustrations (Away from the Bathroom):
A venting system is just as important as the drainage system. It allows air to circulate within the drain pipes, preventing pressure build-up and stopping sewer gases from escaping into the bathroom. Here’s how to tackle the venting:
Connecting to the Existing Stack: Locate the existing vent stack in your downstairs bathroom or kitchen. This is a large vertical pipe that vents out through the roof. You’ll need to connect your new vent pipes to this existing stack.
Building a New Vent Stack: If there’s no existing vent stack in a convenient location, you might need to install a new vent stack that runs from the upstairs bathroom up through the roof. This typically requires consulting a structural engineer and obtaining the necessary permits from your local building department.
Venting Each Fixture: Each drain line in your upstairs bathroom (toilet, sink, shower) needs to be connected to the venting system. Use appropriate fittings to tie each drain line into the main vent stack or a new vent stack, ensuring proper air circulation throughout the entire drainage system.
Step#2 – Bringing in the Water: Supplying the Fixtures
Locating the Source:
Before you start running new water lines, find the main water shut-off valve in your house. This valve allows you to completely turn off the water supply if needed.
Turning Off the Flow:
To ensure safety while working on the water lines, completely turn off the water supply by closing the main shut-off valve.
Planning the Route:
It’s time to plan the path for your new water lines that will bring water up to your new upstairs bathroom.
Here are some key considerations to ensure an efficient and practical water delivery system:
Minimize Distance, Maximize Efficiency: The shorter the distance the water lines need to travel, the less pipe you’ll need to use and the less money you’ll spend on materials. Carefully examine the layout of your house. Look for the most direct route from the existing hot and cold water lines to the planned locations of the fixtures in your upstairs bathroom. Consider existing walls and studs that can be used to conceal the pipes as much as possible, while still maintaining easy access for future maintenance if needed.
Following the Walls and Floors: Water lines are typically run inside the walls and floors for a clean and finished look. Plan the route for your water lines so they run vertically within wall cavities and horizontally within floor joists. When running pipes through walls, try to position them near corners or along edges where they’ll be less noticeable once covered by drywall.
Avoiding Obstacles: As you plan the route, be mindful of any obstacles that could complicate the installation process. Look for electrical wires, heating ducts, or structural supports that you’ll need to navigate around. Consult a structural engineer if unsure about modifying any structural elements to ensure the safety and stability of your home.
Planning for Turns: Sharp bends in water lines can restrict water flow and potentially lead to leaks. While planning the route, try to minimize the number of sharp turns the pipes need to make. If a turn is unavoidable, use large, smooth curves instead of tight bends. There are also special elbow fittings available that allow for gradual changes in direction.
Keeping it Level (Mostly): Ideally, hot and cold water lines should run horizontally at a slight upward slope as they travel towards the upstairs bathroom. This slight incline helps to prevent air pockets from forming within the pipes, which could hinder water flow. While a slight upward slope is preferred, avoid creating any dips or sags in the lines, as this could trap water and lead to corrosion or freezing problems in colder climates.
Drilling for the Pipes:
Following the meticulously planned route, it’s time to carefully drill holes through the floor joists and studs to create the pathway for the new hot and cold water lines. Here’s how to tackle the drilling with precision:
Mark Your Drill Points: Use a level and a pencil to mark the exact locations where you’ll be drilling holes throughout the walls and floors. Refer to your planned route to ensure the markings align perfectly with the intended path of the water lines.
Choosing the Right Drill Bit: Select the appropriate drill bit size for the PEX tubing you’ll be using. A slightly larger bit than the outer diameter of the pipe will allow for easy passage while maintaining a secure fit.
Drilling Through Walls: When drilling through walls, use a drill with a dust collection attachment to minimize dust and debris. Start drilling from the upstairs bathroom towards the downstairs location of the existing hot and cold water lines. Be mindful of the electrical wires, plumbing pipes, and other potential obstacles within the walls as you drill.
Drilling Through Floor Joists: When drilling through floor joists, ensure the holes don’t compromise the structural integrity of the floor. Avoid drilling through the center of the joist where it’s weakest. Instead, drill slightly off-center towards the top or bottom edge of the joist. It’s always best to consult with a structural engineer if you’re unsure about drilling near structural supports.
By following these detailed steps for planning the route and drilling for the pipes, you’ll have a clear pathway for your new water lines, ensuring efficient water flow and a well-organized plumbing system for your upstairs bathroom.
Step#3 – Adding Control Points: Shut-Off Valves
Installing shut-off valves near each fixture provides individual control over the water supply, allowing you to isolate the water flow to a specific fixture for maintenance or repairs without shutting down the entire bathroom. Here’s a detailed breakdown on how to incorporate these handy control points:
Choosing the Right Valves:
Several types of shut-off valves are available, but compression valves are commonly used for PEX tubing due to their ease of use and secure connections. Compression valves have a body with a threaded inlet and outlet, a compression nut, and a compression ring.
Installation:
Grab your PEX cutters, a wrench, and follow these steps to install shut-off valves for both hot and cold water lines near each fixture:
Preparing the Pipe: Locate the hot and cold water lines you previously ran from the downstairs source to the designated connection points for each fixture in your upstairs bathroom. Using your sharp PEX cutters, make clean, straight cuts on each line at the chosen location for the shut-off valve. Ensure the cuts are square and free of any burrs or imperfections.
Attaching the Valve: Slide the compression nut and compression ring onto the prepared end of the PEX tubing, followed by the valve body. The compression ring creates a watertight seal, while the nut tightens it securely in place. Insert the pipe into the valve body until it reaches a built-in stop ring or insert guide that ensures proper placement.
Tightening the Connection: Hold the valve body firmly to prevent it from twisting. Using a wrench, tighten the compression nut in a clockwise direction until snug. Avoid over-tightening, as this could damage the PEX tubing or the valve itself. A good rule of thumb is to tighten the nut until you feel initial resistance, then give it one or two more turns using the wrench.
Double-Checking the Seal: Once the nut is tightened, use a paper towel to wipe around the connection point. Look for any signs of leaking water. If you notice any leaks, loosen the nut slightly, reseat the pipe, and re-tighten the nut following the same procedure.
Repeating the Process: Repeat the steps above to install a separate shut-off valve for both the hot and cold water line near each fixture in your upstairs bathroom. Remember, hot water lines are typically on the left, and cold water lines are on the right when facing the fixture.
By installing shut-off valves, you’re adding a layer of convenience and practicality to your upstairs bathroom plumbing system. In the future, if you ever encounter a plumbing issue with a specific fixture, you can simply turn off the water supply to that fixture using the designated shut-off valve, minimizing disruption to the rest of the bathroom.
Step#4 – Bringing the Goods: Connecting the Water Lines to the Fixtures
Now that you’ve meticulously planned the route, drilled the holes, and installed shut-off valves for individual control, it’s time to connect the water lines to each fixture in your upstairs bathroom. PEX tubing offers a user-friendly solution for this stage, making the connections relatively straightforward. Here’s a detailed breakdown on how to bring the water to your new bathroom haven:
Measuring for Success: Grab a tape measure and meticulously measure the exact distance between the shut-off valve (for hot and cold water) and the connection point on each fixture (toilet, sink, shower). Remember, a little extra length is always better than coming up short! Add an inch or two to each measured distance to account for maneuvering and any slight adjustments needed during installation.
Cutting with Precision: Using sharp PEX cutters specifically designed for the tubing size you’re using, make clean, straight cuts on the hot and cold water lines at the lengths you previously measured. Ensure the cuts are perpendicular (perfectly square) to the pipe for a secure connection. A dull or improper cut can compromise the seal and lead to leaks later.
Making the Connections: PEX tubing connections rely on a crimp ring or clamp system to create a watertight seal.
Here’s how to tackle it:
- Using the Crimp Ring Connection: Slide the appropriate crimp ring onto the prepared end of the PEX tubing. Firmly insert the pipe into the connection point on the shut-off valve or the fixture itself, ensuring it reaches the insert stop (a small ridge inside the fitting).
- Use your crimping tool specifically designed for the size of the crimp ring you’re using. Carefully crimp the ring around the pipe according to the manufacturer’s instructions. The crimping tool will compress the ring, creating a tight seal around the tubing.
Important Note: Always follow the manufacturer’s instructions for your specific crimping tool and crimp rings to ensure a secure and reliable connection.
Clamp Connection: Slide the appropriate clamp designed for PEX tubing over the prepared end of the tubing. Insert the pipe into the connection point on the shut-off valve or the fixture. Now, tighten the clamp screw using a screwdriver until it’s snug but not over-tightened. Over-tightening can damage the PEX tubing or the clamp itself.
Connecting Hot and Cold Separately:
Repeat the connection process (using either crimp rings or clamps) for both the hot and cold water lines to each fixture. Remember, hot water lines are typically on the left when facing the fixture, and cold water lines are on the right. Double-check the markings on the shut-off valves and the fixture connections to ensure you’re connecting the hot and cold lines correctly.
Inspecting Your Work:
Once you’ve connected all the water lines to the fixtures, take a moment to inspect your work. Run your hand along the connections and look for any signs of bulging, loose clamps, or misaligned crimp rings.
Testing for Leaks: A Crucial Step Before turning on the water supply and celebrating a job well done, it’s absolutely essential to conduct a pressure test to identify any potential leaks. Leaks, even small ones, can cause significant damage over time. Here’s how to perform a pressure test:
- Sealing the Ends: Using caps specifically designed for PEX tubing, seal the open ends of all the water supply lines.
- Pressurizing the System: Connect a pressure gauge to a conveniently located water line. You can use a pump specifically designed for pressure testing plumbing systems to pressurize the entire water line network. Aim for the pressure recommended by the PEX tubing manufacturer (usually around 80-100 psi).
- Leak Detection: With the system pressurized, carefully inspect all the connections you’ve made, including the shut-off valves, fixture connections, and anywhere pipes join together.
Look for any signs of leaking water or hissing sounds. Even a small leak can become a major problem later, so address any leaks you find immediately. Tighten any loose connections or replace faulty fittings as needed. Once you’ve addressed all the leaks and the pressure remains steady on the gauge, you can release the pressure by opening a hose bib or other fixture outside the house.
By carefully following these steps and using the appropriate connection method (crimp rings or clamps) for your chosen PEX tubing, you’ll successfully connect the water lines to each fixture in your new upstairs bathroom. Remember, a pressure test
Step#5 – Testing, 1, 2, 3: Checking for Leaks
Before You Turn on the Fun:
Once you’ve completed the rough-in plumbing, it’s crucial to conduct a pressure test to identify any leaks before proceeding. Here’s how to perform a pressure test:
- Sealing the Ends: Using caps specifically designed for PEX tubing, seal the open ends of all the water supply lines.
- Pressurizing the System: Connect a pressure gauge to a conveniently located water line. You can use a pump specifically designed for pressure testing plumbing systems to pressurize the entire water line network. Aim for the pressure recommended by the PEX tubing manufacturer (usually around 80-100 psi).
- Leak Detection: With the system pressurized, carefully inspect all the connections you’ve made, including the shut-off valves, fixture connections, and anywhere pipes join together. Look for any signs of leaking water or hissing sounds.
Even a small leak can become a major problem later, so address any leaks you find immediately. Tighten any loose connections or replace faulty fittings as needed. Once you’ve addressed all the leaks and the pressure remains steady on the gauge, you can release the pressure by opening a hose bib or other fixture outside the house.
Caution: Safety first! Always wear safety glasses and gloves while working with plumbing tools and materials. If you’re unsure about any step during the installation process, don’t hesitate to consult a professional plumber for guidance.
Step#6 – Fixture Installation And Finishing Touches:
Once the plumbing is roughed-in and tested, you can proceed with installing the bathroom fixtures – toilet, sink, shower/tub.
Connect the fixtures to the corresponding water supply lines and drain lines using appropriate fittings.
Install drywall or other fixtures. With the fixtures secured, you’ve reached the final leg of running plumbing for your upstairs bathroom. Here’s how to complete the project:
Shower Valve and Enclosure:
- Install the shower valve body according to the manufacturer’s instructions. Ensure proper water supply connections (hot and cold) and connection points for the showerhead and handheld sprayer (if applicable).
- Carefully follow the manufacturer’s guide for installing the shower enclosure or building a custom shower pan with a waterproof liner and tile.
Faucet and Sink Installation:
- Connect the sink faucet to the designated hot and cold water lines using flexible supply lines.
- Install the sink according to the manufacturer’s instructions, ensuring proper sealing and drainage.
Toilet Installation:
- Secure the toilet flange to the floor, ensuring proper alignment with the drain outlet.
- Install the toilet wax ring on the flange to create a watertight seal.
- Carefully position the toilet bowl onto the flange and secure it with the appropriate bolts and caps.
- Connect the toilet’s water supply line and test for leaks by turning on the water supply valve.
Final Touches and Inspections:
- Once all fixtures are installed and tested for leaks, turn on the main water supply valve and inspect for any leaks around connections.
- Address any leaks promptly.
- Once satisfied with the functionality, you can proceed with the installation of drywall, vanity units, and any desired bathroom accessories.
And that’s how to run plumbing for an upstairs bathroom successfully. It sure is a complicated process but it’s effective.
Additional Considerations:
- Hot Water Heater Capacity: Adding an upstairs bathroom might put a strain on your existing hot water heater capacity. Consider upgrading to a larger unit if necessary to ensure sufficient hot water flow for all fixtures.
- Insulation: Insulate any exposed hot water pipes to minimize heat loss during transport, especially in colder climates.
- Accessibility: If you plan on incorporating the bathroom for users with disabilities, ensure you adhere to the Americans with Disabilities Act (ADA) guidelines regarding grab bars, toilet height, and clear floor space.
When to Call a Professional?
While this guide equips you with the knowledge for running plumbing for an upstairs bathroom, certain situations necessitate professional assistance:
- Complex Layouts: If your desired bathroom location presents a challenging layout with extensive pipe runs or requires modifications to structural supports, consulting a licensed plumber is highly recommended.
- Extensive Remodeling: If your project involves significant structural changes or rerouting of existing plumbing lines, seek the expertise of a qualified plumber to ensure safety and adherence to building codes. JMK Plumbing in Miami has a proven track record in handling extensive bathroom remodeling projects. Our team can ensure your new upstairs bathroom meets all safety regulations and building codes. Get in touch with us today!
- Lack of Confidence: If you lack confidence in your DIY plumbing skills, it’s always advisable to err on the side of caution and hire a licensed plumber to guarantee a professional and leak-free installation.
Performing these detailed steps and considering the additional insights, you’ll succeed at running plumbing for your upstairs bathroom. To pull this off right, do thorough planning, select the proper material, and adhere to building codes for a successful and functional bathroom addition. Good luck!