How to Repair a Delta Shower Faucet at Home: A Comprehensive Guide
Delta shower faucets are known for their durability, but even the most reliable fixtures can experience issues over time. If your Delta shower is leaking, dripping, or experiencing changes in water pressure, you might be able to fix it yourself without having to call a plumber.
According to the Home Improvement Research Institute, over 2 million shower faucets are repaired annually in the United States. A significant portion of these repairs involve Delta faucets. While some repairs are simple and can be completed with basic tools, others might require more specialized equipment or even replacing the entire faucet unit.
Here’s a step-wise guide on how to repair a delta shower faucet – but before that, let’s have a look at the symptoms that indicate you have a faulty delta shower faucet:
Reasons And Symptoms Of a Faulty Delta Shower Faucet
Delta shower faucets are known for their reliability, but like any mechanical device, they can wear out or malfunction over time. Remember that if you’re having difficulty in repairing the delta shower faucet, it’s better to call the professionals. You can consider giving this task to JMK plumbing – a pioneer plumbing company that has been serving the parts of Miami for years.
Anyways, here’s a breakdown of the most common reasons for a faulty Delta shower faucet and the symptoms that might indicate you need a repair:
Reasons:
- Faulty Valve Cartridge: The valve cartridge is the heart of your Delta shower faucet. It regulates water flow and temperature. Over time, the cartridge can wear out due to mineral deposits, rubber seal degradation, or simply everyday use.
- Worn-Out Seals: Delta shower faucets use various rubber seals to create watertight connections within the faucet body. These seals can deteriorate with age, leading to leaks.
- Mineral Buildup: Hard water can cause mineral deposits to accumulate within the faucet, restricting water flow and potentially causing corrosion.
- Damaged Parts: Although less common, internal components like springs or screws can break or become misaligned, affecting the faucet’s operation.
Symptoms:
- Leaks: This is the most common symptom of a faulty Delta shower faucet. Leaks can originate from around the base of the handle, the spout, or even behind the faucet escutcheon (the decorative plate).
- Dripping: A persistently dripping faucet not only wastes water but can also be quite annoying. This is often a sign of a worn-out valve cartridge or damaged seals.
- Changes in Water Temperature: If you experience sudden fluctuations in water temperature while showering, it could indicate a faulty valve cartridge that’s struggling to regulate water flow properly.
- Difficulty Controlling Water Pressure: A decrease in water pressure or difficulty achieving the desired water pressure could be caused by mineral buildup within the faucet or a malfunctioning valve cartridge.
- Loose or Stiff Handle: A handle that feels loose or stiff when turning could be due to worn-out components within the cartridge or a misaligned handle attachment.
Recognizing these symptoms and understanding the potential reasons behind them, you can diagnose the problem with your Delta shower faucet and determine if a simple cartridge replacement, a more comprehensive rebuild, or professional help is necessary.
Now, let’s learn how to repair a delta shower faucet:
Step-by-Step Guide on How to Repair a Delta Shower Faucet
Replacing a faulty valve cartridge is a common fix for various Delta shower faucet problems. Here’s a comprehensive breakdown of the steps involved, guiding you through the process efficiently:
1. Turn off the water supply:
Locate the shut-off valve for your shower. It’s usually situated behind the access panel near the shower base. Alternatively, if your house doesn’t have individual shut-off valves for fixtures, you might need to turn off the water supply to the entire house at the main valve.
2. Drain the water:
Open a downstairs faucet or outside hose bib to drain any remaining water from the pipes. This will minimize the amount of water that spills out when you remove the cartridge. Additionally, turn on the shower faucet handle completely and hold it for a few seconds to remove any residual water from the unit itself.
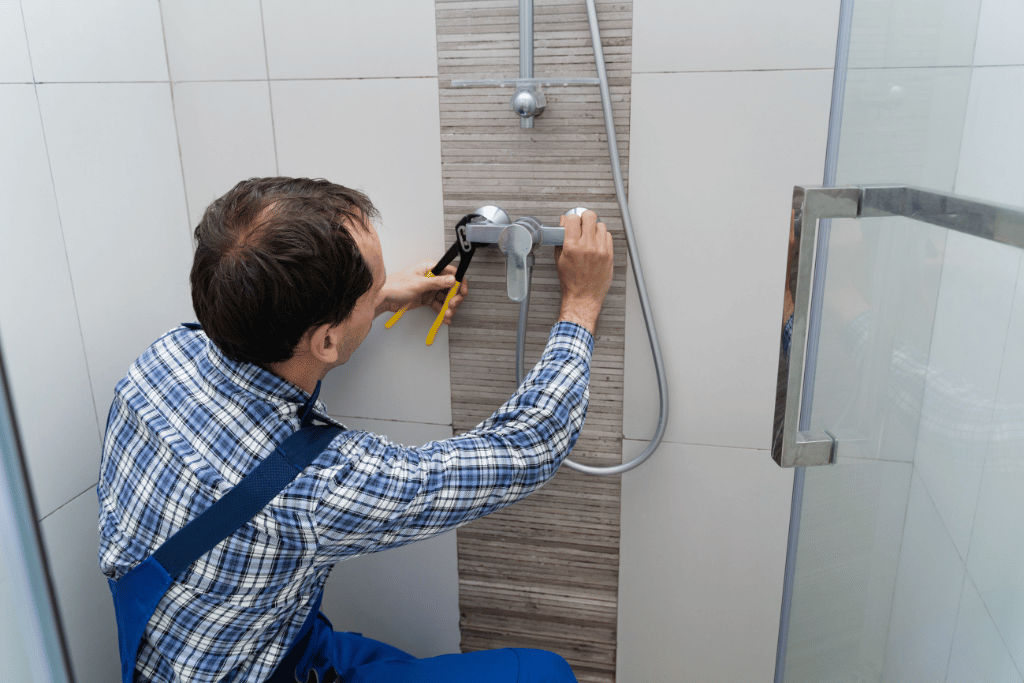
3. Remove the handle:
Most Delta shower handles are secured with a small Allen screw located underneath a decorative cap. These caps can be simply pried off with a flat-head screwdriver or your fingernail. Use the appropriate size Allen wrench to remove the screw by turning it counter-clockwise. Once the screw is removed, gently pull the handle straight off the faucet stem.
4. Remove the trim sleeve and spacer (optional):
Depending on your specific Delta shower model, there might be a trim sleeve and spacer located beneath the handle. These parts are usually easy to remove by hand or by gently prying them off with a flat-head screwdriver.
5. Remove the bonnet nut:
This nut is located beneath the trim sleeve (if present) and secures the valve cartridge in place. Use a strap wrench for better grip to loosen and remove the bonnet nut by turning it counter-clockwise. Be careful not to damage the nut with pliers or channellock tools, as these can scratch or dig into the metal. If the nut is stuck, you can try tapping it gently with a rubber mallet to loosen its grip. Pro Tip: Wrap a rag around the bonnet nut before tapping it to avoid marring the finish.
6. Extract the valve cartridge:
Once the bonnet nut is removed, you should be able to pull the cartridge straight out of the faucet body. Be prepared for a small amount of water to drain out as you remove the cartridge, so have a towel on hand to catch any drips.
7. Inspect the old cartridge (optional):
While not essential for replacing the cartridge, take a moment to examine the removed cartridge for signs of wear and tear. Look for cracks, mineral deposits, or worn-out rubber seals. This can help you confirm that a faulty cartridge was indeed the source of your shower problems.
8. Purchase a replacement valve cartridge:
Make sure to buy a replacement cartridge that’s specifically compatible with your Delta shower model. You can find the model number engraved on the handle or escutcheon (the decorative plate around the base of the handle). If you’re unsure about the model number, take the old cartridge with you to the hardware store for comparison.
9. Install the new valve cartridge:
Carefully insert the new cartridge into the faucet body, ensuring the hot and cold markings on the cartridge correspond with the respective hot and cold water supply lines. Most Delta cartridges will have a notch or key that needs to line up with a slot in the faucet body for proper installation.
10. Reassemble the faucet:
Tighten the bonnet nut by hand as much as possible, then use the strap wrench to snug it further. Be careful not to over-tighten, as this can damage the nut or the cartridge. Reattach the trim sleeve and spacer (if present) by gently pushing them back into place.
11. Reattach the handle:
Slide the handle back onto the faucet stem and secure it with the Allen screw. Tighten the screw with the Allen wrench, but don’t over-tighten it.
12. Turn on the water supply slowly:
Gradually turn on the water supply valve, allowing air to escape from the pipes. You might hear a hissing sound as the air purges. Once all the air is purged, open the faucet completely and check for leaks. Start by checking around the bonnet nut and handle for any drips or streams of water.
13. Test the faucet operation:
Turn the handle on and off and adjust the temperature to ensure the cartridge functions properly. There should be no leaks, and the water temperature should change smoothly as you adjust the handle.
If you think that the problem in your faucet requires more than your DIY skills then seek expert faucet repairing services of JMK plumbing. You’ll be in safe hands.
Things to Consider When Repairing a Delta Shower Faucet
Before diving into repairs, here are some crucial factors to consider:
Identify your Delta shower faucet model: Knowing the specific model is essential for purchasing the correct replacement parts, whether it’s a valve cartridge or a rebuild kit. Delta faucets typically have a model number engraved on the handle or escutcheon. You can also consult your owner’s manual or search online using physical descriptions of your faucet.
Gather the necessary tools: The tools required for both repairs will generally include an Allen wrench, strap wrench, flat-head screwdriver, and pliers (use channellock pliers cautiously to avoid damaging nuts). For rebuilding the faucet, you might need additional tools depending on your specific model.
Assess the severity of the problem: If your Delta shower faucet is experiencing a minor leak or difficulty controlling temperature, replacing the valve cartridge might be sufficient. However, for extensive leaks, dripping, or complete water failure, rebuilding the internal parts might be necessary.
Consider the cost-effectiveness: While repairing a Delta shower faucet can save you money compared to replacing the entire unit, factor in the cost of replacement parts and your own time investment. If the repairs seem complex or the parts are expensive, it might be more cost-effective to hire a professional plumber.
Safety Precautions When Repairing a Delta Shower Faucet
- This is the most crucial safety step to prevent unexpected water flow and potential damage during repairs.
- The recommended tools will help you complete the repairs efficiently and minimize the risk of damaging the faucet components.
- Good lighting allows you to see the parts clearly and avoid mistakes during disassembly and reassembly.
- When turning on the water supply after repairs, do so gradually to allow air to escape from the pipes and prevent leaks.
- If you discover leaks during the repair process, immediately turn off the water supply and address the leak before proceeding.
Final Words
Taking charge of your Delta shower faucet repairs can be a fulfilling DIY project. Not only will you save money, but you’ll also gain valuable plumbing skills that can be useful for future maintenance tasks. This guide has provided a comprehensive roadmap on how to repair a Delta shower faucet by replacing the valve cartridge and by rebuilding the internal parts.