A Complete Guide on How to Install Bathroom Plumbing Rough-in
When remodeling or constructing a bathroom, one of the crucial steps is installing bathroom plumbing rough-in. This process lays the foundation for your plumbing system, ensuring proper functionality and longevity.
In this guide, we’ll walk you through the steps on how to install bathroom plumbing rough-in effectively. So, let’s begin:
What is Rough-In Plumbing?
In order to fully understand how to install bathroom plumbing rough-in, you must be familiar with what it entails.
In simpler words, rough-in plumbing is the initial phase of plumbing installation in a new construction or renovation project. It involves laying out the plumbing lines and fixtures before the walls and floors are finished. This includes installing the pipes, drains, and vents that will connect to your sinks, toilets, showers, and bathtubs.
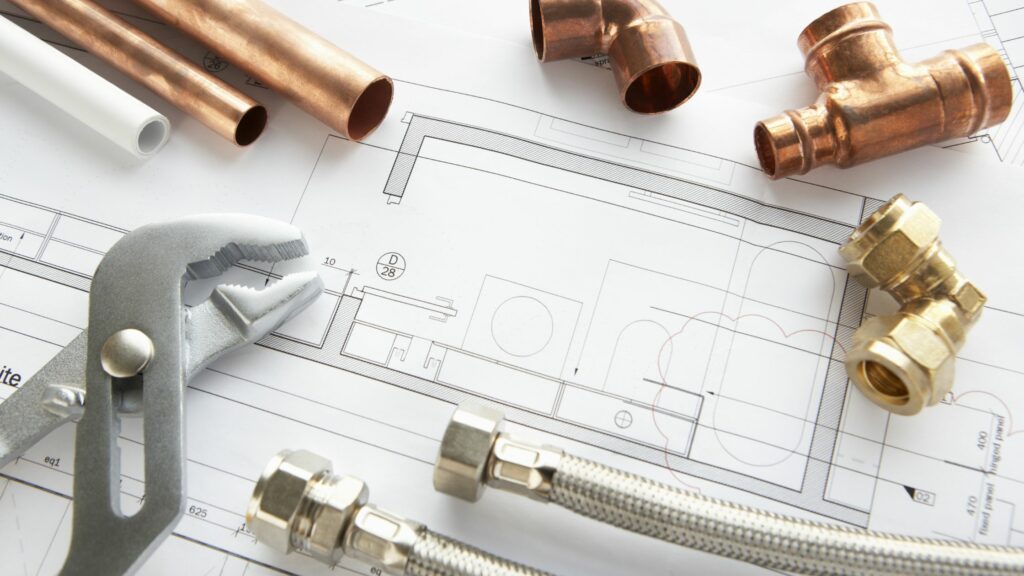
Rough-In Bathroom Plumbing Tools and Materials You Will Require
Equipping yourself with the right tools and materials is crucial for a smooth and successful rough-in bathroom plumbing job. Here’s a breakdown of the essentials:
Tools:
Measuring and Marking:
- Tape measure
- Level
- Sharpie marker
- Stud finder (optional)
Cutting and Joining:
- Pipe cutter (specific to your chosen pipe material)
- Hacksaw (for wood or metal framing)
- PEX crimping tool (if using PEX piping)
- Wrenches (adjustable and pipe wrench)
- Channel locks
Drilling and Fastening:
- Power drill with various drill bits
- Screwdrivers (flathead and Phillips)
- Hammer
- Utility knife
- Staples/staple gun (for securing pipes)
Materials:
Pipes:
Choose the right type for your application (e.g., PEX, PVC, CPVC, copper) in appropriate diameters for hot and cold water supply and drain lines.
Fittings:
Elbows, tees, couplers, adapters, connectors, as needed for your layout.
Drain components:
- P-traps for each fixture
- Drain vents and vent pipes
- Vent stack connectors
Other Materials:
- Pipe hangers and straps
- Pipe insulation (optional, for hot water lines)
- Sealant tape or paste
- Safety glasses and gloves
Note:
- Consider the specific requirements of your local building codes when choosing materials and planning your layout.
- If you’re unsure about any aspect of the job, consult a professional plumber for guidance. You can hire the services of JMK plumbing if you’re based in Miami Florida.
- Remember, proper safety precautions are essential. Wear safety glasses and gloves when working with tools and materials.
The next section of our guide on How to rough in plumbing for bathroom is selecting the dimensions.
Selecting Bathroom Plumbing Rough-In Dimensions
The bathroom plumbing rough in measurements ensure that your plumbing system functions efficiently and complies with local building codes. Here’s a detailed breakdown of the key dimensions you need to know:
Bathroom Sink Rough-In:
The rough-in dimensions for a bathroom sink play a critical role in ensuring proper drainage and functionality. Here are the essential measurements:
- Center of Drain: The center of the sink’s drain should be approximately 18 inches above the finished floor. This positioning allows for optimal water flow and prevents potential backups.
- Water Lines Rough-In: The water supply lines for the bathroom sink should be roughed-in at a height of approximately 21 inches above the finished floor. These lines are typically spaced 8 inches apart, measured from the center of the drain. Adequate spacing between the hot and cold water lines ensures balanced water distribution and accessibility for future maintenance or repairs.
These rough-in dimensions provide the necessary framework for installing the sink’s plumbing components, including the drain assembly and water supply lines. It’s essential to follow these measurements precisely to avoid issues such as improper drainage or inaccessible plumbing connections.
Toilet Rough-In:
The rough-in dimensions for a toilet are equally important for proper installation and functionality. Here’s what you need to know:
- Center of Closet Flange: The center of the toilet’s closet flange should be positioned 12 inches from the finished rear wall. This placement ensures proper clearance and alignment for connecting the toilet to the drainage system.
- Total Clearance: There should be a minimum of 32 inches of total clearance between the finished side wall and the bathroom vanity. This space allows for comfortable access to the toilet and ensures adequate maneuverability for users.
Shower Rough-In:
The rough-in dimensions for a shower are crucial for ensuring proper installation and functionality. Here’s what you need to know:
Shower Drain Placement: The center of the shower drain should typically be positioned at least 2 inches from the finished wall and approximately 12 inches from the shower’s entry point. This placement allows for efficient water drainage and minimizes the risk of water pooling near the entrance.
Shower Valve Rough-In: The rough-in height for the shower valve should be approximately 48 inches above the finished floor. This positioning ensures convenient access for operation and maintenance while also allowing for proper installation of the valve components.
Shower Head Rough-In: The rough-in height for the shower head should typically be around 80 inches above the finished floor. This height provides adequate clearance for most users and allows for comfortable showering without the risk of hitting one’s head on the shower head.
These dimensions serve as guidelines for positioning the toilet within the bathroom space and connecting it to the plumbing system. Proper alignment and clearance are essential to ensure the toilet functions correctly and complies with building codes.
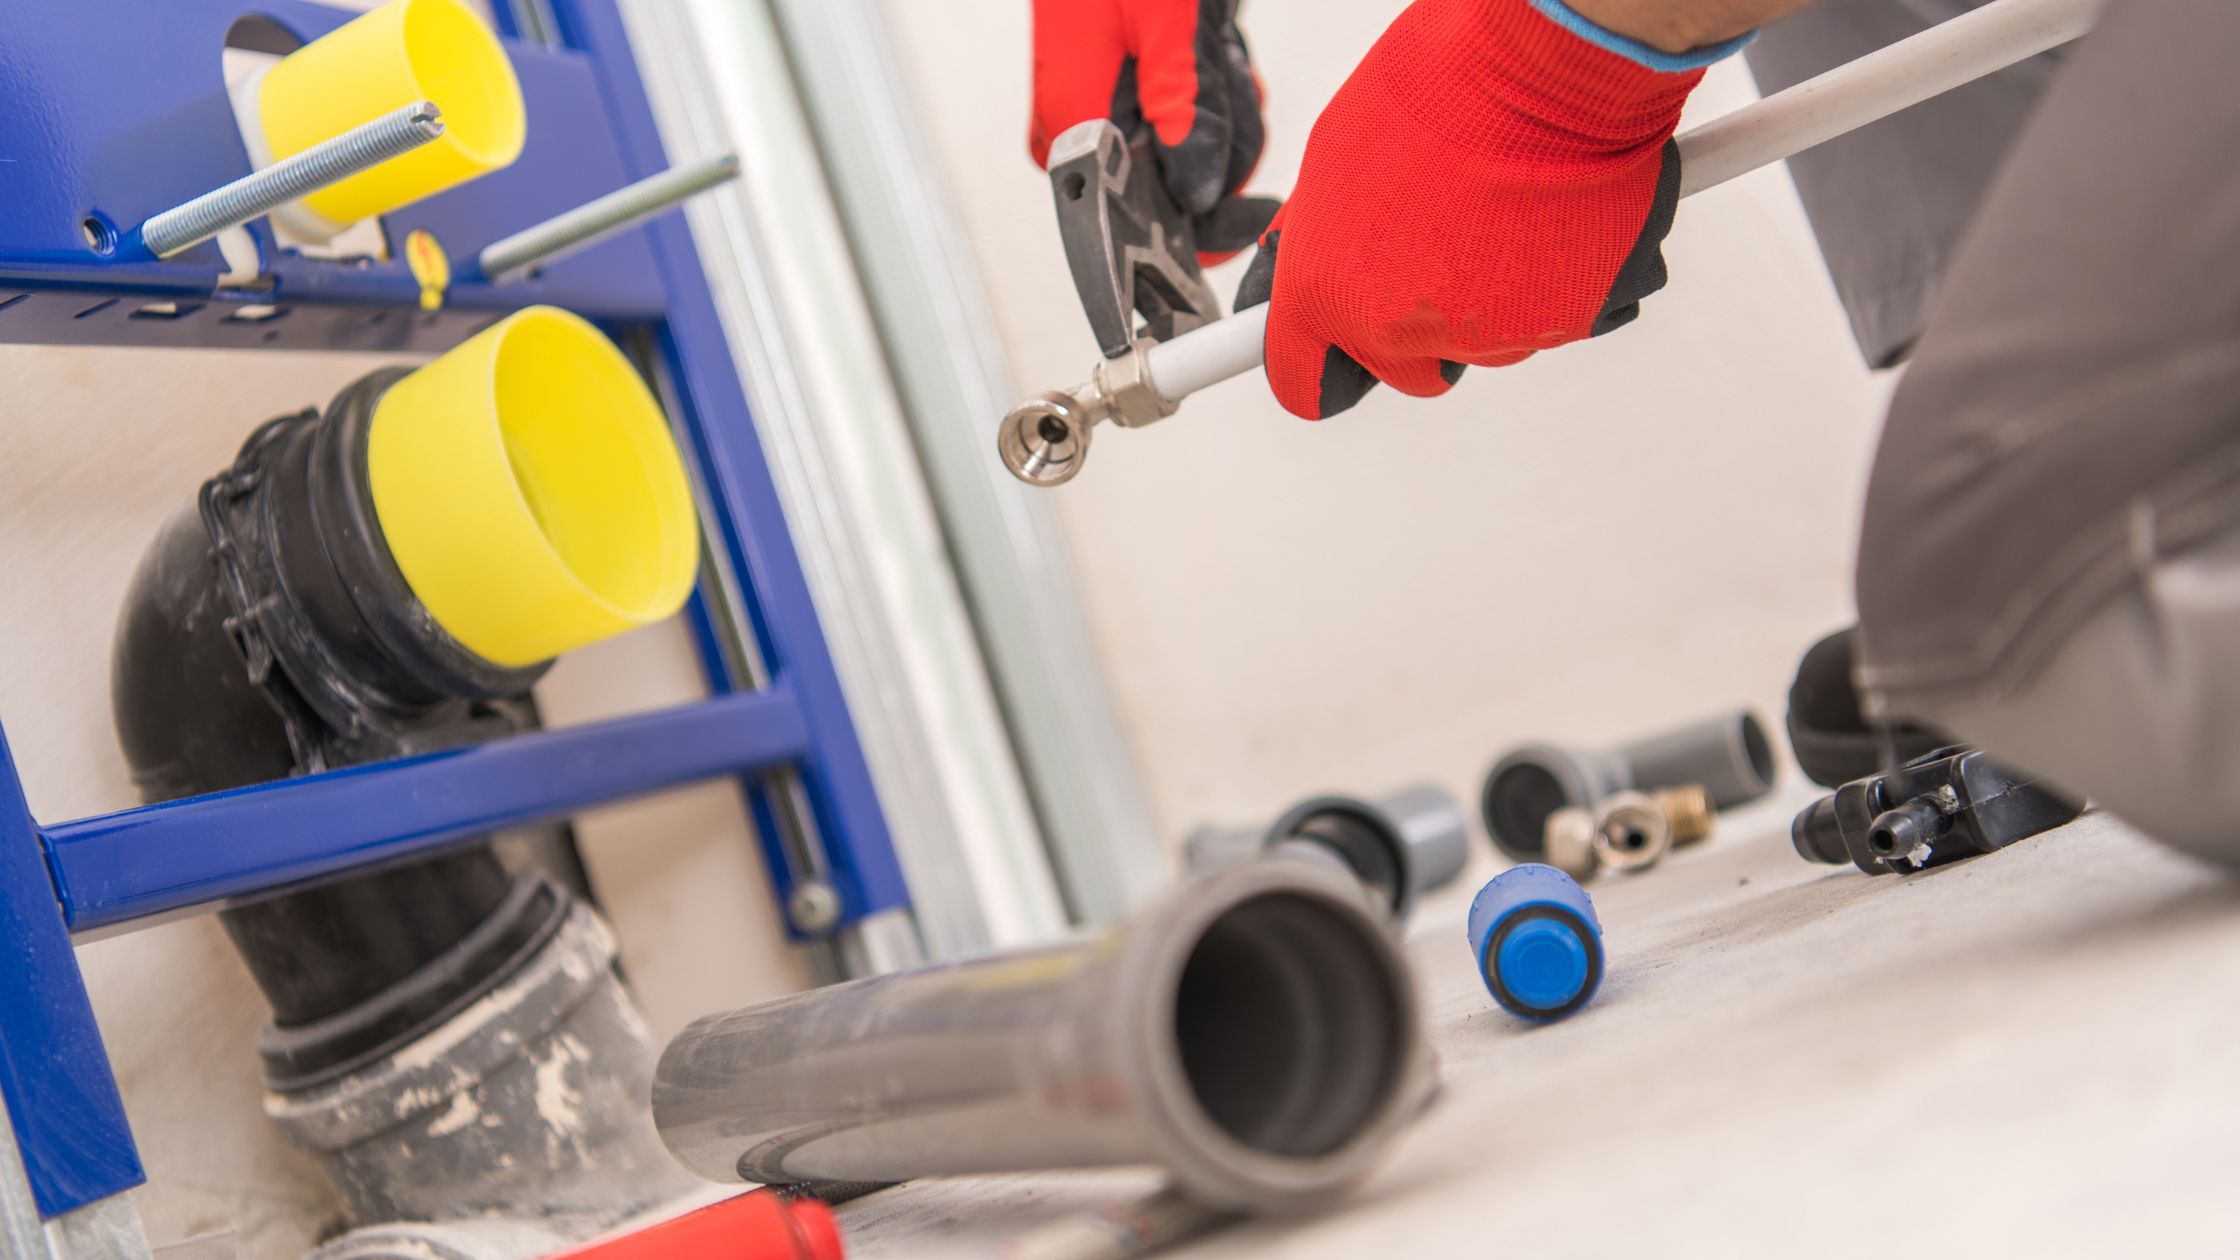
Steps on How to Install Bathroom Plumbing Rough-in for a Sink, Toilet, and Shower
Let’s learn how to set up the basic plumbing for sinks, toilets, and showers.
1. How to Install a Bathroom Sink Rough-in
Installing a bathroom sink rough-in involves several steps to ensure proper positioning and connection of the plumbing components. Here’s a general guide on how to install a bathroom sink rough-in:
Preparation and Marking:
Begin by preparing the area, shutting off the water supply, and clearing out any existing fixtures. Once ready, determine the optimal location for the sink and mark the positions for the drain pipe and water supply lines on both the wall and floor, adhering to local building codes and regulations.
Installing the Drain Pipe:
Cut the drain pipe to the required length using a hacksaw if needed, and connect it securely to the existing plumbing system. Utilize PVC primer and cement for PVC pipes or appropriate fittings for other materials. Install a P-trap or S-trap to prevent sewer gas infiltration.
Setting up Water Supply Lines:
Identify the placement for the hot and cold water supply lines, then cut copper or PEX pipes to the correct length using a pipe cutter. Integrate shut-off valves onto the main water supply lines and connect the water supply lines, ensuring proper fittings and securing them to the wall or floor with clips or straps.
Mounting the Sink Bracket/Hanger:
Depending on the sink type, mount a sink bracket or hanger securely onto the wall or supported by blocking within the wall, following the manufacturer’s instructions carefully to ensure stability and support.
Testing and Adjustments:
After completing the rough-in, test the system by turning on the water supply and checking for leaks. Make any necessary adjustments to connections and fittings to guarantee a secure and watertight installation.
Finishing Touches:
Once the rough-in is successfully tested, cover the exposed pipes with drywall or other suitable materials, maintaining accessibility for future maintenance. Proceed to install the sink basin, faucet, and any additional fixtures according to the manufacturer’s guidelines.
Sealing and Cleanup:
Apply silicone caulking around the edges of the sink to prevent water damage and ensure a tight seal. Install any remaining accessories and thoroughly clean the work area, disposing of debris properly.
2. How to Install a Toilet Rough-in:
Prepare: Begin by shutting off the water supply to the bathroom and removing any existing toilet fixtures. Mark the desired location for the toilet, ensuring it complies with local building codes and regulations. Measure and mark the position for the toilet flange on the floor, considering the distance from the wall and any clearance requirements.
Installing the Toilet Flange: Fit the toilet flange into the waste pipe opening on the floor, ensuring it sits securely and level. Use screws or bolts to attach the flange firmly to the floor, ensuring a tight seal to prevent leaks.
Install the Closet Bolts: Insert the closet bolts into the slots on the sides of the toilet flange, aligning them with the mounting holes on the toilet base. Secure the closet bolts in place using washers and nuts, tightening them evenly.
Set the Wax Ring: Place a wax ring or wax ring with a rubber gasket onto the toilet flange, ensuring it’s centered over the waste pipe opening. Carefully lower the toilet bowl onto the wax ring, ensuring the closet bolts protrude through the mounting holes on the base.
Secure the Toilet Bowl: Press down firmly on the toilet bowl to compress the wax ring and create a tight seal. Tighten the nuts on the closet bolts using a wrench, alternating between sides to ensure even pressure.
Connect the Water Supply: Install a new flexible water supply line between the shutoff valve and the toilet tank inlet. Hand-tighten the connections, then use a wrench to snugly secure them without over-tightening.
Test the Toilet: Turn on the water supply and check for any leaks around the base and water supply connections. Flush the toilet multiple times to ensure proper flushing and tank refilling.
Make Adjustments: If there are leaks or issues, make necessary adjustments to ensure proper installation. Tighten connections, replace seals, or adjust the toilet’s position as needed.
Finish the Installation: Apply a bead of silicone caulking around the base of the toilet to seal it to the floor. Install the toilet seat according to the manufacturer’s instructions to complete the installation.
Cleanup: Dispose of any debris or materials from the installation process and ensure the area around the toilet is clean and tidy. With these steps, you can install a toilet rough-in correctly, ensuring functionality and minimizing the risk of leaks or other issues.
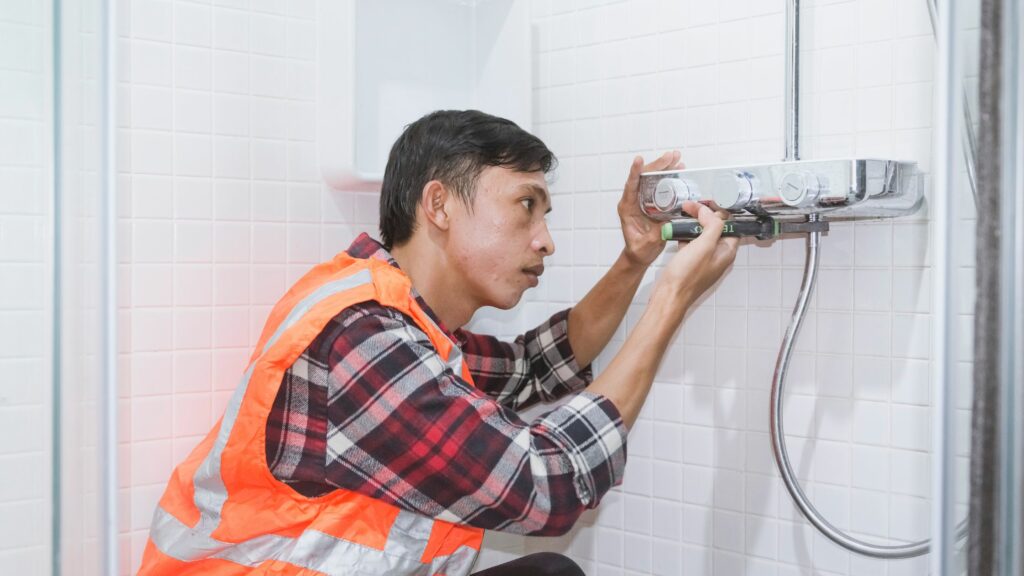
3. How to Install a Shower Rough-in:
Here’s a comprehensive guide on how to plumb a shower:
- Prepare the Area: Before beginning any installation, turn off the water supply to the bathroom and remove any existing fixtures or tiles. Ensure the area is clean and free from debris.
- Plan the Plumbing Layout: Determine the ideal location for the shower, considering factors such as accessibility, space, and plumbing connections. Plan the layout of the water supply lines, drain, and fixtures.
- Rough-in the Plumbing: Start by roughing in the plumbing for the shower. This involves running water supply lines from the main water source to the shower location. Ensure proper sizing and positioning of the pipes to accommodate the shower fixtures.
- Install the Shower Drain: Plumb the shower drain by connecting it to the existing drain system. Ensure the drain slope is adequate for proper water drainage and prevent pooling. Use a level to ensure the drain is installed correctly.
- Set Up the Shower Valve: Install the shower valve, which controls the water temperature and flow. Follow the manufacturer’s instructions for proper installation, including soldering or connecting the valve to the water supply lines.
- Connect the Shower Head and Faucet: Plumb the shower head and faucet by connecting them to the shower valve. Use thread seal tape or plumber’s putty to create a watertight seal and prevent leaks. Ensure the fixtures are securely attached and aligned properly.
- Test the Plumbing: Turn on the water supply and test the plumbing for leaks and proper functionality. Check for leaks around connections and the shower valve. Adjust connections or tighten fittings as needed to eliminate leaks.
- Seal the Shower Enclosure: Once the plumbing is successfully installed and tested, seal the shower enclosure to prevent water damage. Apply silicone caulking along the seams and edges of the shower walls and floor to create a watertight seal.
- Install Shower Walls and Tiles: Install the shower walls and tiles to complete the enclosure. Use waterproof materials and adhesive to ensure durability and prevent water infiltration. Allow the adhesive to dry completely before using the shower.
Importance of Venting in Rough-In Plumbing
Venting plays a critical role in rough-in plumbing, ensuring the proper functioning of the drainage system and safeguarding against potential issues such as trap seal loss and sewer gas infiltration. Here’s why venting is essential:
1. Protecting Trap Seals:
Every plumbing fixture, such as sinks, toilets, and showers, contains a trap—a curved section of pipe that holds water to prevent sewer gasses from entering the building. Venting allows air to enter the drainage system, equalizing pressure and preventing suction forces that could siphon water from traps. This maintains the integrity of trap seals, ensuring they remain effective in blocking sewer gasses from entering your home.
2. Preventing Drainage Issues:
Proper venting helps prevent drainage issues by allowing wastewater to flow smoothly through the system. Without adequate ventilation, drainage can become sluggish, leading to clogs, backups, and foul odors. Vent pipes provide an avenue for air to enter the system, preventing airlock and facilitating the free flow of wastewater.
3. Minimizing Pressure Fluctuations:
As wastewater flows through the drainage system, it creates fluctuations in air pressure. Without vents to equalize this pressure, trap seals can be compromised, leading to the loss of the water seal and allowing sewer gases to enter the living space. Venting helps stabilize pressure within the system, reducing the likelihood of trap seal loss and associated issues.
4. Compliance with Building Codes:
Building codes typically mandate the installation of venting systems to ensure the safety and functionality of plumbing systems. Adhering to these codes is essential to pass inspections and obtain necessary permits for your plumbing project. Proper venting not only ensures compliance but also promotes the longevity and efficiency of the plumbing system.
5. Enhancing Overall Plumbing Performance:
A well-ventilated plumbing system operates more efficiently and reliably. By facilitating the free flow of wastewater and preventing the buildup of pressure, venting helps maintain optimal plumbing performance. This translates to fewer instances of clogs, backups, and odors, as well as a reduced risk of costly repairs and maintenance in the future.
Now that we’ve learned how to rough in bathroom plumbing, let’s move on to the cost:
What is the Cost of Installing Rough-in Bathroom Plumbing?
The cost of rough-in bathroom plumbing can vary significantly depending on various factors. Here’s a breakdown of what influences the cost and what you can expect across different budget ranges:
Bathroom Dimensions: The size of your bathroom plays a significant role in determining the cost of plumbing. Larger bathrooms with more fixtures will require more extensive plumbing work, leading to higher costs.
Existing Plumbing Infrastructure: If your home already has plumbing lines in place, leveraging these existing connections can simplify the process and reduce costs compared to starting from scratch, where new pipes need to be installed.
Material Selection: The type of pipes used can impact costs. Copper pipes, while durable and resistant to corrosion, are more expensive than PEX pipes, which are a cost-effective alternative. However, working with PEX pipes may require specialized expertise.
Labor Expertise: The hourly rates of licensed plumbers vary based on factors such as location, experience, and the complexity of the project. More complicated installations or custom work may incur higher labor costs.
Permits and Inspections: It’s essential to consider permit fees and potential inspection costs associated with plumbing work, as these can add to the overall expenses.
Based on these factors, the cost spectrum for rough-in bathroom plumbing can be categorized into three ranges:
- Budget-Conscious: Typically ranging from $3,000 to $5,000, this category suits smaller bathrooms with existing plumbing infrastructure and the use of cost-effective materials.
- Mid-Range: Falling between $6,500 and $10,000, this range is suitable for average-sized bathrooms requiring some new plumbing work and standard materials.
- Luxury-Driven: For large bathrooms with extensive plumbing needs and high-end materials, costs can range from $15,000 to $20,000.
It’s important to note that these are estimates, and the actual cost can vary based on individual circumstances. To get a precise assessment, it’s advisable to engage a licensed plumber. Their expertise allows them to evaluate your specific requirements thoroughly and provide a detailed quote tailored to your needs.
By consulting with a professional such as JMK Plumbing, you can ensure that the plumbing work meets all regulatory standards in Miami Florida, and is completed to your satisfaction.
Final Words
Undoubtedly, installing bathroom plumbing rough-in is a complex task that often requires professional expertise to ensure precision and compliance with safety standards. While this guide equips you with valuable insights into how to install bathroom plumbing rough-in, it’s important to acknowledge that executing the job flawlessly without professional assistance can be challenging.
For a seamless and stress-free experience, consider enlisting the services of trusted professionals like JMK Plumbing. With their experience and dedication to excellence, they can expertly handle all aspects of your bathroom plumbing rough-in installation, leaving you with peace of mind and a job well done.