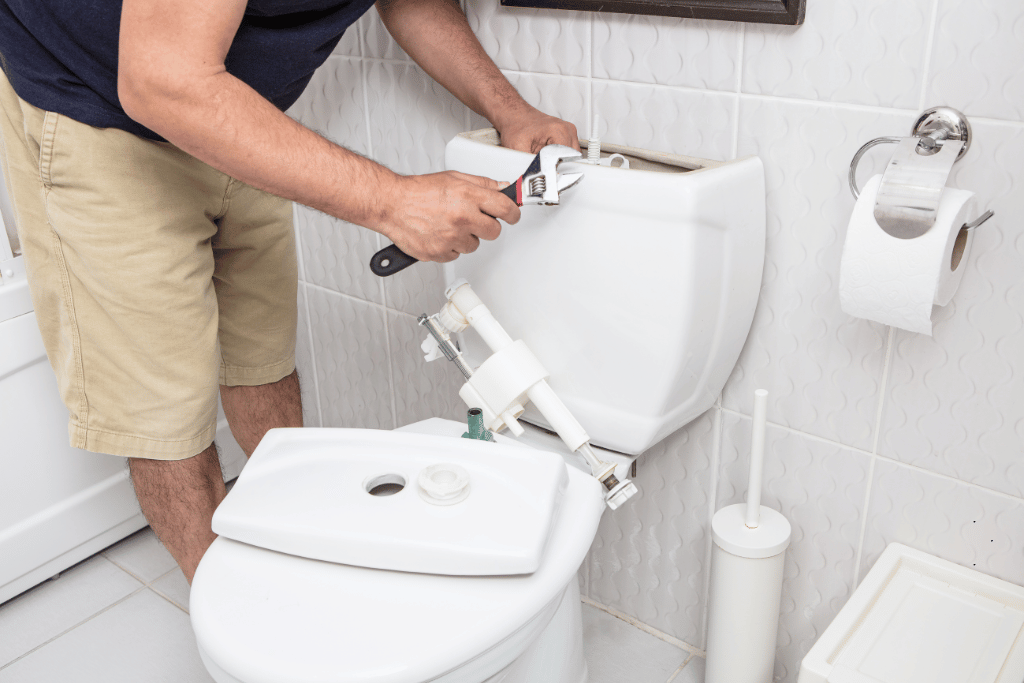
How to Install a Korky Toilet Repair Kit
Is your once-reliable toilet suddenly showing signs of rebellion? Slow refills, constant running, or weak flushes can disrupt even the most peaceful bathroom routine. The culprit behind these common problems is often worn-out internal components.
Luckily, there’s a simple and effective solution: installing a Korky Platinum Complete Toilet Repair Kit. This all-in-one kit provides everything you need to tackle these issues and restore your toilet to its former functionality. This guide will walk you through the entire process on how to install a Korky toilet repair kit.
Tools You Will Need to Install a Korky Toilet Repair Kit
- Adjustable wrench
- Optional: Flathead screwdriver (for stubborn nuts)
- Bucket (to catch any excess water)
- Rag (for cleanup)
What is a Korky Toilet Repair Kit?
The Korky Platinum Complete Toilet Repair Kit is more than just a collection of parts; it’s a toolbox for conquering a variety of toilet woes. This comprehensive kit boasts everything you need to address the most common bathroom battles, all in one convenient package.
Let’s explore the Korky cavalry and the problems they vanquish:
Running Toilets: Say goodbye to the constant trickle and the inflated water bill! The Korky kit includes a high-performance fill valve, designed to be a quiet and reliable replacement for outdated ballcocks (those floaty spheres you might see in older toilets). This modern valve ensures your toilet fills to the proper level and then stops, putting a stop to those pesky running issues.
Noisy Refills: Is your toilet refilling its water supply with a sound that could wake the dead? The Korky flapper comes to the rescue! This innovative flapper boasts a built-in strainer that keeps debris at bay, preventing noisy disruptions. The flapper itself is also renowned for its quiet operation, so you can refill in peace.
Slow Refills or Weak Flushes: Does your toilet seem to take forever to fill up, or leave you longing for a more forceful flush? The Korky kit tackles these problems too. The high-performance fill valve ensures a steady and efficient refill, while the included flush valve replacement addresses issues like weak flushes.
In fact, the Korky kit goes the extra mile with these user-friendly features:
- Universal Compatibility: This kit boasts a 2-inch flapper, making it the most universal option on the market. The fill valve is also designed to fit a whopping 99% of toilets, so compatibility worries become a thing of the past.
- Easy Installation: No need to be a plumbing pro! The innovative twist-lock adjustment on the flapper makes installation a breeze. The enclosed float on the fill valve also eliminates the frustration of the float getting caught on the tank walls.
- Durability and Peace of Mind: Made in the USA and backed by a 5-year warranty, the Korky kit is built to last.
The Cavalry:
Here’s a breakdown of the specific components included in the Korky kit:
- (1) 528MP Fill Valve: The quiet and reliable replacement for outdated ballcocks.
- (1) 100 Toilet Flapper: Universally compatible and renowned for its quiet operation with a built-in strainer.
- (1) Refill Tube & Metal Clip: Ensures a secure connection between the fill valve and flapper.
- (1) 4030 Flush Valve & Tank to Bowl Gasket: Creates a watertight seal and addresses weak flush issues.
- (3) Bolts, (3) Rubber Washers, (3) Metal Washers, (3) Nuts: Everything you need to reinstall the tank securely.
- (1) Set of Instructions: Your clear guide to a successful toilet repair mission.
With the Korky Platinum Complete Toilet Repair Kit, you have everything you need to transform your bathroom warrior back into a champion of peace and efficiency.
Step-by-Step Guide on How to Install a Korky Toilet Repair Kit
With your tools and kit at hand, let’s get started!
1. Turn Off the Water Supply and Drain the Tank:
Locate the shut-off valve behind the toilet and turn it clockwise until snug to stop the water flow. Hold down the flush lever to drain the remaining water in the tank. If any water remains, use a sponge to soak it up.
2. Disconnect the Water Supply Line and Remove the Tank:
Using the adjustable wrench, loosen the nut connecting the water supply line to the fill valve. Place the bucket underneath the connection point to catch any dripping water. Once loose, detach the line.
3. Remove the Old Flapper and Flush Valve:
Inside the tank, locate the flush valve assembly (the mechanism the flush lever connects to) and the flapper (the rubber seal that covers the flush valve opening). Unscrew the mounting nut holding the flush valve in place. If the nut is stubborn, a flathead screwdriver can be used gently to pry it loose (be careful not to damage the porcelain). Once loose, lift out the old flush valve and flapper assembly.
4. Install the New Flush Valve and Tank to Bowl Gasket:
Slide the new tank-to-bowl gasket onto the threads of the flush valve. Carefully place the assembly into the tank opening, ensuring the gasket sits flush against the underside of the tank.
5. Secure the Flush Valve and Reattach the Tank:
Hand-tighten the mounting nut from inside the tank. Do not overtighten! Next, position the tank back onto the bowl, aligning the tank bolts with the corresponding holes. Place the rubber washers, metal washers, and nuts onto the bolts from the bottom of the bowl. Tighten the nuts evenly and in a crisscross pattern to create a secure seal.
6. Install the New Fill Valve:
Refer to the Korky instructions for specific details on your particular fill valve model. Generally, the process involves inserting the fill valve into the designated hole in the tank, attaching the refill tube and clip, and adjusting the float arm to regulate the water level.
7. Connect the Flapper Chain and Reattach the Water Supply Line:
Attach the flapper chain to the flush lever arm, ensuring minimal slack. Reconnect the water supply line to the new fill valve and tighten the nut with the wrench.
8. Test and Adjust:
Turn on the water supply valve slowly. Allow the tank to fill and observe for any leaks around the tank-to-bowl connection or the fill valve. If leaks occur, retighten the corresponding connections. Once filled, flush the toilet and check for proper operation. The flapper should seal the flush valve opening completely, and the toilet should refill quietly and efficiently.
Final Words
And that’s all the information you need to know on how to install a Korky toilet repair kit. With this kit, fixing a leaky toilet is a straightforward task that can be completed by most do-it-yourselfers. If you’re not comfortable tackling the job yourself, JMK Plumbing is always happy to help. You can call us at 786-876-7523 to get a free quote.